For a while, I wanted to create this demo, for which I’ll be using Power Apps to insert data into an Azure SQL database and show the results in our report. In this example, I’ll insert and update some records, refresh the page, and refresh the dataset using Power Automate. There will be two examples: One with DirectQuery and one with Imported data. For both, we’ll be using the same database table.
Create a database table
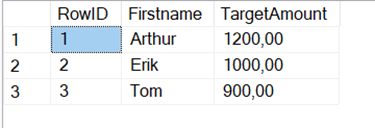
First, I connect to an Azure SQL Database (so I won’t need a Data Gateway), select my database and create a table. After that, I insert three rows of data.
CREATE TABLE [dwh].[TargetPerConsultant](
	[RowID] [int] IDENTITY(1,1) PRIMARY KEY,
	[Firstname] [varchar](50) NULL,
	[TargetAmount] [smallmoney] NULL
) ON [PRIMARY]
GO

INSERT INTO [dwh].[TargetPerConsultant] (FirstName,TargetAmount)
VALUES ('Arthur',1200),
 ('Erik', 1000),
 ('Tom', 900)
It’s essential here to create an ID column and make it the Primary Key, otherwise, Power Apps won’t let you write back to the database. With the IDENTITY(1,1), I’ll ensure it’s an autoincrement value. This is what the table looks like right now:
And with that our first part is done, lets’s start with Power BI!
Creating a Power BI Report
In Power BI I make a connection to my SQL Server database, and use the DirectQuery option:

Then I select my required table and load the data.

The next thing to do is to show some visuals to make the data visible:

And now it’s time for the fun stuff! By using the Power Apps visual, we’re going to create our app to write to the database:

Before we can move to Power Apps, we must add the fields that we want to use in Power Apps to the fields bucket. I’ll put all my columns there and then we can start building!

You get the option to choose an app you already created or create a new one. If you create this app in Power Apps, you don’t get the PowerBIIntegration data source. This one is used to refresh the page and make our changes visible immediately. So that’s why we now select Create new. You’ll get a message that you will be sent to the browser and to the Power Apps Studio.
Power Apps Studio
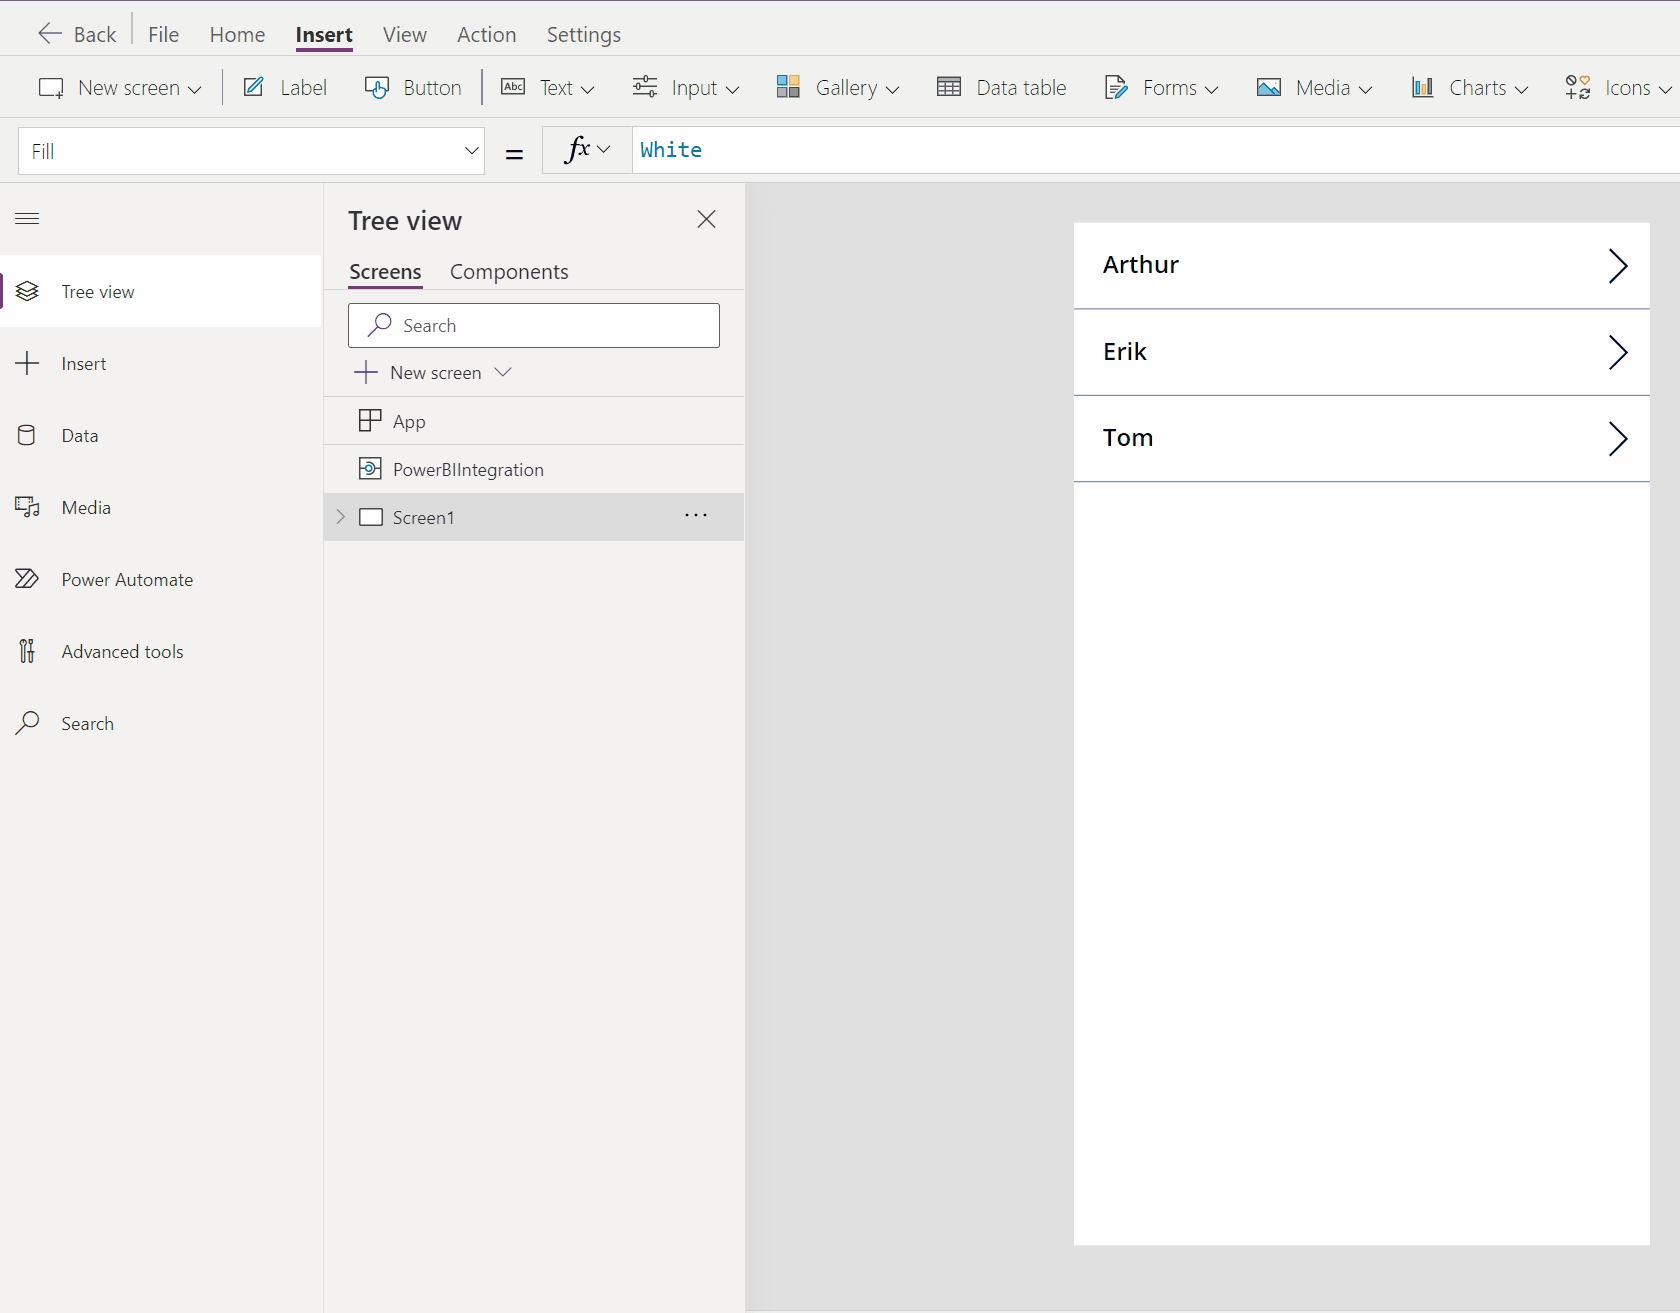
The screen that will open looks like this:

On the left you see the menu, next to that you’ll find the Tree view, in the middle a canvas that’s already been created for you and on the right some details. Now, first we going to create a connection to our database, by using the Data menu item.
By clicking on Add data, you can add a SQL Server to our project:

We’ll be using the same SQL Server as where our Target per Consultant table is located. After connecting you can select the tables you want to use. After connecting we can start building our Power App!

First, I create a new page called Scrollable Canvas, delete the screen that Power Apps already created for us, and add a Gallery to our new page.
Now we need to adjust some properties.
Data source:

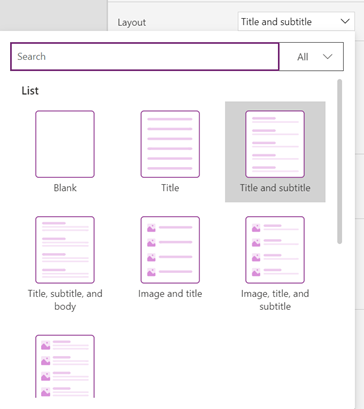
Gallery Layout:
Fields, so we have the target Amount as subtitle:

I’ll also give my page a title and rename the page from Screen # to Overview:

Now we create a new Scrollable Canvas and instead of adding a gallery, we’ll add an editable form:

Now we will have to connect our data source again, and select the fields we want to edit:

After that, select the form, and change the formula to Item = Gallery#.Selected. The field will be filled with some data. Now if you select another consultant on the Overview page, you’ll see that information. But before that, we need to add some actions.

On the Insert menu, go to Icons and select the < Left icon:

Move it to a nice spot on your canvas, we’re going to use this button to navigate back to the overview page. With the icon selected on your canvas, go to Action, Navigate, and select the Overview page:

Now, if you’ll use ALT+Left mouse click on the button, you’ll navigate to the overview page. Now lets rename our new page to EditForm and select the > right icon on your overview page to change the navigation action of that one:

Now can easily navigate through our application:

On our EditForm screen, we need to add a button, so we can save the changes we made in our table. For that, go to Insert, Button, and you’ll get a nice button. Let’s give it the text “Submit”. With the button still selected, give it the following formula:

This will submit our form to SQL Server and refresh the page as well. Now select the form, and create the following formula:

If the form is successfully processed, we will navigate back to the Overview page. On the Overview page, we need to create another icon, with a Plus sign, which will be used to create an empty form in our EditForm screen. Give this button the following formula:

Now when we use the Play Icon in the right top corner or by pressing F5, we can test our application:

Our database is updated, so it works!

Now we must save our Power App and make it available. After doing that, for some reason, my PowerApps visual in Power BI still stays on the same screen. So, I’ll remove that one. That way I get the option to choose an already created one:

You will now see your Power App inside your Power Bi report and you’ll be able to interact with it! In the Power BI Desktop, you will still have to press the refresh queries button to see your changes, but if you publish your report and watch it in the Power BI Service:

Using Import Data
If you use Import Data mode instead of DirectQuery, you need to find a way to refresh the dataset before refreshing the page. For that, we’re going to use a button that connects to a Power Automate flow. But first, I create the same report using Import mode and publish my report to a workspace. Then I’ll make some changes to the Power App we created before.
In PowerApps, go to Action, Power Automate, and then Create New flow:

And then select Create From Blank. Now in the next step, search for Power BI Refresh. In the list you’ll find the Refresh a dataset action:

When you select that Action, you’ll have to select the Workspace and the Dataset you want to use in this action. That’s the reason why I already published my report to the workspace:

After saving, you’ll be redirected back to Power Apps, where we will update our Submit button:

Instead of using the PowerBIIntegration.Refresh, we will run the PowerApp -> Refreshdataset. Because a refresh of the dataset can take some time. We’ll create an extra button on our Overview screen, to refresh the visual on the page and add the PowerBIIntegration.Refresh there:

Now we can save and publish this version of the Power App and add it to our report. With this result:

Now, since our dataset is very small, the refresh doesn’t take that long, which is nice for our demo:

But be careful, if you’re not in a premium (per user, or per capacity) workspace you cannot reload that many times, also not via PowerAutomate.
Ending
Hopefully, you’ll find this information useful and I’m curious to know which scenarios you can think of where this would be helpful!
Take care.
Thanks to these sources:
https://www.cittabase.com/refresh-power-bi-dataset-from-report-using-power-automate/

Hey Erik, great read! This tutorial was really easy to follow. Being a fellow tech blogger myself, I also really appreciate how organized and well-formatted everything was – it definitely made the content much more digestible overall. Keep up the awesome work!
LikeLike
Thank you Rohan!
LikeLike